Input Widgets
Input widgets are used for capturing user interactions, either by cicking, typing or dragging.
They usually provide three functions:
- ADD - this creates the widget
- GET - this gets the contents/state of the widget
- SET - this changes what's in the widget
As well as options to change the way they look/act.
For each of the above to work, we need to know which widget you are referring to - so every widget gets a unique title.
If you want your input widget to have a label, there are some auto-label functions
If you wnat to get the contents of all widgets in the GUI as a single dictionary, use:
* .getAllInputs(includeEmptyInputs=False)
This will return the contents of all input fields as a dictionary.
Set includeEmptyInputs to True, if you want to include any empty input fields.
Entry
Entries are used to capture typed input from the user. They take a single parameter - a title.
There are five special-case Entries:
- NumericEntry - this only allows numbers to be typed in - always returns a float (None if empty).
- SecretEntry - this will show stars, instead of the letters typed - useful for capturing passwords.
- AutoEntry - this takes a list of words to provide auto-completion.
- ValidationEntry - can be set to valid/invalid/waiting - will colour the border green/red/black and show a ✔/✖/★
- OpenEntry/SaveEntry/DirectoryEntry - provides a button to select a file/directory and auto-populates the Entry
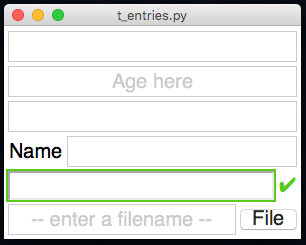
from appJar import gui

app=gui()

app.addEntry("e1")
app.addEntry("e2")
app.addEntry("e3")
app.addLabelEntry("Name")
app.addValidationEntry("v1")
app.addFileEntry("f1")

app.setEntryDefault("e2", "Age here")
app.setEntryValid("v1")

app.go()
Add Entries
.addEntry(title).addNumericEntry(title).addSecretEntry(title).addValidationEntry(title).addOpenEntry(title).addSaveEntry(title).addDirectoryEntry(title).addAutoEntry(title, words)
This also takes awordsparameter, which must be a list, and is used to populate he drop-down.
Each of these will add the specified type of Entry, using the title provided.
Set Entries
-
.setEntry(title, text, callFunction=True)
This sets the contents of the specified Entry.
SetcallFunctionto be False, if you don't want to call any associated functions. -
.setEntryDefault(title, text)
This sets a default value to display in an Entry.
Once the user starts typing, it will disappear.
The text is centered, shown in a light gray font, and will not be returned by.getEntry(title) -
.setEntryUpperCase(title)&.setEntryLowerCase(title)
This will force all text typed into the Entry to be uppercase/lowercase. -
.setEntryMaxLength(title, maxLength)
This will set a maximum length for the specified Entry.
Any additional characters typed will be discarded. -
.setEntryValid(title)&.setEntryInvalid(title)&.setEntryWaitingValidation(title)
These will set the relevant status of a Validation Entry (how it looks).
(Have a look here for help displaying special characters)

-
.setValidationEntry(title, state="valid")
Same as above, set flag to one ofvalid,invalidorwait. -
.setValidationEntryLabelBg(title, bg)
This allows you to change the colour of the validation label, in a validation entry. -
.setAutoEntryNumRows(title, rows)
This will set the number of rows to display in an AutoEntry.
NB. this is limited to the depth of the GUI - if there is no space, then no rows will be displayed.
-
.appendAutoEntry(title, value)
This will add the value/list of values to the specified AutoEntry. -
.removeAutoEntry(title, value)
This will remove the value from the specified AutoEntry. -
.changeAutoEntry(title, value)
This will replace all items in the specified AutoEntry with a new list of values. -
.clearEntry(title, callFunction=True)
This will clear the contents of the specified Entry.
SetcallFunctionto be False, if you don't want to call any associated functions. -
.clearAllEntries(callFunction=False)
This will clear all Entries in the GUI.
SetcallFunctionto be True, if you want to call any associated functions. -
.setFocus(title)
This will put the cursor in the specified Entry, so that the user can start typing without needing to click.
Get Entries
-
.getEntry(title)
This will return the contents of the specified Entry.
NB. numericEntries always return a float. -
.getAllEntries()
This will return the contents of all Entries in the app, as a dictionary.
NB. numericEntries always return a float.
TextArea
Similar to an Entry, but allows you to type text over multiple lines.
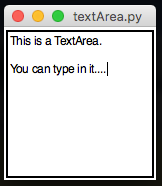
from appJar import gui

app=gui()
app.addTextArea("t1")
app.go()
Add TextAreas
-
.addTextArea(title, text=None)
Adds an empty TextArea, with the specified title. -
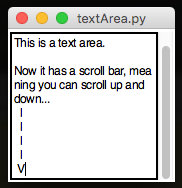
.addScrolledTextArea(title, text=None)
Adds a scrollable TextArea with the specified title.
Set TextAreas
-
.setTextArea(title, text, end=True, callFunction=True)
Adds the supplied text to the specified TextArea.
By default, the text is added to the end.
Setendto be False if you want to add at the beginning.
SetcallFunctionto be False, if you don't want to call any associated functions. -
.clearTextArea(title, callFunction=True)
Clears the contents of the specified TextArea.
SetcallFunctionto be False, if you don't want to call any associated functions. -
.clearAllTextAreas(callFunction=False)
This will clear the contents of all TextAreas in the app.
SetcallFunctionto be True, if you want to call any associated functions. -
.highlightTextArea(title, start, end=END)
Highlights all text from start position, to the end position (defaults to the end of the text area).
NB. positions should be a string in the formatLINE.CHAR, eg.1.4wil start on the 1st line at the 4th character.
Get TextAreas
-
.getTextArea(title)
Gets the contents of the specified TextArea. -
.getAllTextAreas()
This will return the contents of all TextAreas in the app, as a dictionary.
Search TextAreas
.searchTextArea(title, pattern, start=None, stop=None, nocase=True, backwards=False)
Will find, highlight and return the position of the specified pattern.
If nostartposition is provided, appJar will start searching form the cursor's position.
Setnocaseto False, if you want the search to be case sensitive.
Setbackwardsto True, if you want to search backwards.
TextArea Fonts
Fonts are tricky on TextAreas, it's currently not possible to have different font sizes & families on different parts of a TextArea.
However, it is possible to make parts of the TextArea bold, italic or underlined.
-
.setTextAreaFont(title, **kwargs)Used to change the family and size of the named TextArea's font.
Passfontwith a number to change the size of all text in the TextArea.
Passfamilywith a strinf to change the font-family of all text in the TextArea. -
.textAreaApplyFontRange(title, tag, start, end=END)
Apply the specified font styling to the specified range.
The tag should be one of BOLD, ITALIC or BOLD_ITALIC - it will replace the previous font tag.
Additionally, the UNDERLINE tag can be used alongside the above. -
.textAreaApplyFontSelected(title, tag)
Apply the specified font styling to the currently selected text. -
.textAreaToggleFontRange(title, tag, start, end=END)
Invert the named tag on the specified range. -
.textAreaToggleFontSelected(title, tag)
Invert the named tag on the selected text.
Tag TextAreas
A simple syntax highlighter:
from appJar import gui

redWords = ("string", "integer", "boolean", "real")
greenWords = ("print", "input")

def highlightSyntax(param):
    for w in redWords:
        app.tagTextAreaPattern("ta", "red", w)
    for w in greenWords:
        app.tagTextAreaPattern("ta", "green", w)

with gui("Text Editor", "300x400") as app:
    app.text("ta", focus=True, change=highlightSyntax)
    app.tagTextArea("ta", "red", background="red", foreground="white")
    app.tagTextArea("ta", "green", background="green", foreground="white")
-
.textAreaCreateTag(title, **kwargs)
Create the named tag, with the specified arguments. -
.textAreaChangeTag(title, **kwargs)
Change the named tag, with the specified arguments. -
.textAreaDeleteTag(title, *tags)
Delete the named tags. -
.textAreaTagPattern(title, tag, pattern, regexp=False)
Apply a previously made tag to the specified pattern.
Setregexpto True if you want to use a regular expression. -
.textAreaTagRange(title, tag, start, end)
Apply a previously made tag to the specified range. -
.textAreaTagSelected(title, tag)
Apply a previously made tag to the currently selected text. -
.textAreaUntagRange(title, tag, start, end)
Remove the named tag from the specified range. -
.textAreaUntagSelected(title, tag)
Remove the named tag from the selected text. -
.textAreaToggleTagRange(title, tag, start, end)
Invert the named tag on the specified range. -
.textAreaToggleTagSelected(title, tag)
Invert the named tag on the selected text. -
.getTextAreaTags(title)
Gets a list of all tags on the text area. -
.getTextAreaTag(title)
Gets all details about the specified tag.
Button
A clickable button, that will call a function.
These are the key to starting an interactive application.
The GUI is looping, waiting for something to happen.
A button click is the classic way to start interacting with a GUI.
Whenever any function is called by the GUI, the title of the widget that called it is passed as a parameter.
That way, multiple widgets can use the same function, but different actions can be performed, depending on the name passed as a parameter.
    from appJar import gui

    # the title of the button will be received as a parameter
    def press(btn):
        print(btn)

    app=gui()
    # 3 buttons, each calling the same function
    app.addButton("One", press)
    app.addButton("Two", press)
    app.addButton("Three", press)
    app.go()
Add Buttons
-
.addButton(title, function)
Add a single button to the GUI, the text on the button will be the same as the button's title.
A function should be specified, which will be called when the button is clicked, where the title is passed as a parameter to the function.
Alternatively, the function can have no parameter, and appJar will not supply an argument. -
.addButtons(titles, functions)
It's possible to add a list of buttons to the GUI.
Pass a 1-dimensional or 2-dimensional list, and they will be rendered accordingly.
A single function can be passed, to use for all buttons.
Or a list of functions can be passed, which MUST correspond to the buttons. -
.addImageButton(title, function, imgFile, align=None)
This creates the named button, as above, using the specified image.
If align is set, the image will be aligned relative to the text, otherwise the image will replace the text. -
.addIconButton(title, function, iconName, align=None)
This creates the named button, as above, using the specified icon.
If align is set, the image will be aligned relative to the text, otherwise the image will replace the text. -
.addNamedButton(name, title, function)
By default, it's not possible to have two buttons with the same text.
If that's required, a named button should be used.
This allows a name and title to be set for a button.
The name will be displayed on the button, and the title passed to the function.
Set Buttons
-
.setButton(name, text)
This will change the text displayed on a button, but NOT the value passed as a parameter to the function. -
.setButtonImage(title, image, align=None)
This allows an image to be placed on a button, instead of the usual text.
If align is set, the image will be aligned relative to the text, otherwise the image will replace the text.
Link/WebLink
Clickable text to call a function or launch a URL
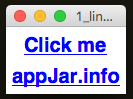
from appJar import gui
def press(link):
    app.infoBox("Info", "You clicked the link!")

app=gui()
app.setFont(20)
app.addLink("Click me", press)
app.addWebLink("appJar.info", "http://appJar.info")
app.go()
Add Links
-
.addLink(title, func)
Adds a hyperlink, that when clicked, will call the specified function. -
.addWebLink(title, page)
Adds a hyperlink, that when clicked, will launch the default browser, and load the specified page.
It must be a fully formed link, includinghttp://
Get Links
.getLink(title)
Returns the text displayed in the link.
Set Links
.setLink(title, func)
Changes the function/webpage the link calls.
RadioButton
A group of round boxes, only one of which can be selected.
These are great for getting a single value, for a multiple choice question.
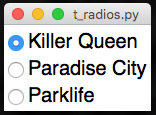
from appJar import gui

app=gui()
app.addRadioButton("song", "Killer Queen")
app.addRadioButton("song", "Paradise City")
app.addRadioButton("song", "Parklife")
app.go()
Add RadioButtons
.addRadioButton(title, name)
This will create a RadioButton grouped by the specified title.
This button will have the value of name.
Radio buttons are usually used in groups.
Set RadioButtons
-
.setRadioButton(title, value, callFunction=True)
This will tick the specified RadioButton.
SetcallFunctionto be False, if you don't want to call any associated functions. -
.setRadioSquare(title, square=True)
It is possible to use square buttons instead of the classic circular radio-button.
Setting square to True will convert all the radio-buttons for this title to square boxes.
Not supported in ttk or on Mac. -
.clearAllRadioButtons(callFunction=False)
This will reset all RadioButtons in the app to their first value.
SetcallFunctionto be True, if you want to call any associated functions.
Get RadioButtons
.getRadioButton(title)
Gets the value of the selected RadioButton, for the specified title.
    from appJar import gui

    def press(rb):
        print(app.getRadioButton("song"))

    app=gui()
    app.addRadioButton("song", "Killer Queen")
    app.addRadioButton("song", "Paradise City")

    # call this function, when the RadioButton changes
    app.setRadioButtonChangeFunction("song", press)

    app.addButton("PLAY", press)
    app.go()
.getAllRadioButtons()
This will return the contents of all RadioButtons in the app, as a dictionary.
CheckBox
A simple tick-box, with a label, that can be either ON or OFF.
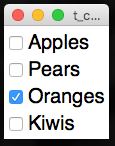
from appJar import gui

app=gui()
app.setFont(20)

app.addCheckBox("Apples")
app.addCheckBox("Pears")
app.addCheckBox("Oranges")
app.addCheckBox("Kiwis")

app.setCheckBox("Oranges")

app.go()
Add CheckBoxes
-
.addCheckBox(title)
This creates a CheckBox, with the specified title. -
.addNamedCheckBox(name, title)
By default, it's not possible to have two CheckBoxes with the same text.
If that's required, a named CheckBox should be used.
This creates a CheckBox, with the specified title.
The name will be displayed next to the CheckBox, and the title passed to the function as a unique ID.
Set CheckBoxes
-
.setCheckBox(title, ticked=True, callFunction=True)
This will tick the CheckBox, or untick it if ticked is set to False.
SetcallFunctionto be False, if you don't want to call any associated functions. -
.clearAllCheckBoxes(callFunction=False)
This will clear (untick) all CheckBoxes in the app.
SetcallFunctionto be True, if you want to call any associated functions. -
.setCheckBoxText(title, text)
This changes the text shown alongside the specified CheckBox.
Get CheckBoxes
-
.getCheckBox(title)
This will return True or False, depending on the state of the CheckBox. -
.getAllCheckBoxes()
This will return the contents of all CheckBoxes in the app, as a dictionary.
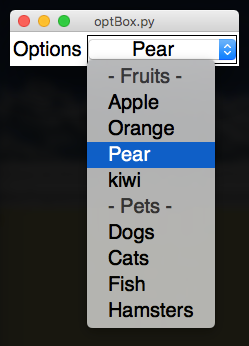
OptionBox
Creates a simple drop-down box.
It is only possible to select one option from this drop-down.
Pass in a list of values to show in the drop-down box.
They will be added in the same order, with the first item shown.
If the first item is empty, a simple title - options - will be created.
Any other empty items will be removed.
If an item starts with a dash (-), it will be treated as a separator, and can't be selected.
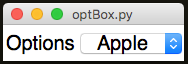
from appJar import gui

app=gui()
app.setFont(20)
app.addLabelOptionBox("Options", ["- Fruits -", "Apple", "Orange",
                        "Pear", "kiwi", "- Pets -", "Dogs", "Cats",
                        "Fish", "Hamsters"])
app.go()
Add OptionBoxes
-
.addOptionBox(title, values)
This will create an OptionBox, adding the contents of the values list, in the order specified. -
.addTickOptionBox(title, values)
This will create an OptionBox made up of check boxes.
Thetitlewill always be displayed as the selected entry in the OptionBox, event though it can't be selected/ticked.
Instead of selecting a single item, you tick the ones you want.
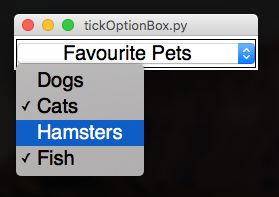
Calling
.getOptionBox(title)will return a dictionary of the options along with a True/False value.
from appJar import gui

def get(btn):
    print(app.getOptionBox("Favourite Pets"))

app=gui()
app.setFont(20)
app.addTickOptionBox("Favourite Pets", ["Dogs", "Cats", "Hamsters", "Fish"])
app.addButton("GET", get)
app.go()
Set OptionBoxes
-
.changeOptionBox(title, newOptions, index, callFunction=False)
This will replace the contents of the OptionBox, with the new list provided.
If specified, the indexed item will be selected - this can be a position or an item name.
If setting a TickOptionBox, the old list will be replaced with the new list. None will be ticked.indexwill be ignored.
SetcallFunctionto be True, if you want to call any associatedchangefunctions. -
.setOptionBox(title, position, value=True, callFunction=True, override=False)
This will select the item in the list, at the position specified.
Alternatively, the name of an item can be specified.
If changing a TickOptionBox, the specified item will be set to the specified value.
SetcallFunctionto be False, if you don't want to call any associated functions.
By default, you can't select a disabled item. You can change this by settingoverrideto be True. -
.setOptionBoxDisabledChar(title, disabled="-")
Set the character used to indicate disabled options. -
.renameOptionBoxItem(title, item, newName, callFunction=False)
This will rename the specified item in the named OptionBox.
SetcallFunctionto be True, if you want to call any associatedchangefunctions. -
.clearOptionBox(title, callFunction=True)
This will set the named OptionBox back to its first value (even if it's disabled).
SetcallFunctionto be False, if you don't want to call any associated functions. -
.clearAllOptionBoxes(callFunction=False)
This will set all OptionBoxes in the app back to their first value (even if it's disabled).
SetcallFunctionto be True, if you want to call any associated functions. -
.deleteOptionBox(title, position)
This will delete the item in the list, at the position specified.
Alternatively, the name of an item can be specified.
Not available on TickOptionBoxes.
Get OptionBoxes
-
.getOptionBox(title)
This will return the currently displayed value in an OptionBox.
Or a dictionary of names, and their boolean value if a TickOptionBox.
Will return None, if an invalid option is currently selected. -
.getAllOptionBoxes()
This will return the contents of all OptionBoxes in the app, as a dictionary.
SpinBox
A scrollable list of options. Up and down buttons are provided to scroll from one item to the next.
Unlike the OptionBox, you do not get a drop-down of choices, instead it spins to the next/previous option.

from appJar import gui

app=gui()
app.setFont(20)
app.addLabelSpinBox("options", ["Apple", "Orange", "Pear", "kiwi"])
app.go()
Add SpinBoxes
-
.addSpinBox(title, values)
This will create a SpinBox, adding the contents of the values list, in the order specified. -
.addSpinBoxRange(title, from, to)
This will create a SpinBox, with a numeric range of items.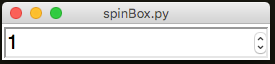
    from appJar import gui

    app=gui()
    app.setFont(20)
    app.addSpinBoxRange("Numbers", 1, 12)
    app.go()
Set SpinBoxes
-
.setSpinBox(title, value, callFunction=True)
This will select the specified value in the SpinBox.
SetcallFunctionto be False, if you don't want to call any associated functions. -
.setSpinBoxPos(title, pos, callFunction=True)
This will select the value at the specified position in the SpinBox.
SetcallFunctionto be False, if you don't want to call any associated functions. -
.changeSpinBox(title, vals, reverse=True)
Replaces the contents of the specified SpinBox with the newvals.
SetreversetoFalseif you don;t ant to reverse the values. -
.clearSpinBox(callFunction=False)
This will set the specified SpinBox back to its initial value.
SetcallFunctionto be True, if you want to call any associated functions. -
.clearAllSpinBoxes(callFunction=False)
This will set all SpinBoxes in the app to their first value.
SetcallFunctionto be True, if you want to call any associated functions.
Get SpinBoxes
-
.getSpinBox(title)
This will get the selected value from the specified SpinBox. -
.getAllSpinBoxes()
This will return the contents of all SpinBoxes in the app, as a dictionary.
ListBox
A box containing a list of items, single or multi-select
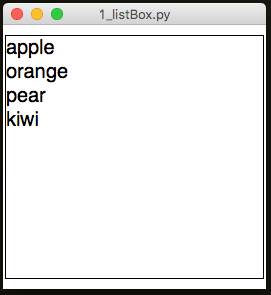
from appJar import gui

app=gui()
app.setFont(20)
app.addListBox("list", ["apple", "orange", "pear", "kiwi"])
app.go()
Add ListBoxes
-
.addListBox(title, values)
Creates a ListBox with the specified values. -
.addListItem(title, item)
Adds a single item to the the end of the ListBox, and selects it. -
.addListItems(title, items)
Adds a list of items to the end of the List Box, selecting the last one.
Set ListBoxes
-
.setListItem(title, item, newVal, first=False)
.setListItemAtPos(title, pos, newVal)
Changes the specified list item to the new value.
Iffirstis set to True, only the first item found will be changed.
Otherwise, all occurrences of the specified value will be changed. -
.removeListItem(title, item)
.removeListItemAtPos(title, pos)
Remove the specified item from the specified ListBox.
Will only remove the first item that matches the parameter. -
.clearListBox(title, callFunction=True)
Removes all items from the specified ListBox.
SetcallFunctionto be False, if you don't want to call any associated functions. -
.clearAllListBoxes(callFunction=False)
This will remove all items from all ListBoxes in the app.
SetcallFunctionto be True, if you want to call any associated functions. -
.updateListBox(title, items, select=False, callFunction=True)
Replace the contents of the specified ListBox with the new values.
If you setselectto be True, the last item in the list will be selected.
SetcallFunctionto be False, if you don't want to call any associated functions.
from appJar import gui
def press(btn):
    items = app.getListItems("list")
    if len(items)> 0:
        app.removeListItem("list", items[0])

app=gui()
app.setFont(20)
app.addListBox("list", ["apple", "orange", "pear", "kiwi"])
app.addButton("press",  press)
app.go()
-
.selectListItem(title, item, callFunction=True)
.selectListItemAtPos(title, pos, callFunction=False)
Selects the specified item in the specified ListBox.
SetcallFunctionto be False, if you don't want to call any associated functions. -
.deselectListItemAtPos(title, pos, callFunction=False)
Seselects the item at the specified position.
SetcallFunctionto be True, if you want to call any associated functions. -
.deselectAllListItems(title, callFunction=False)
Deselects all items in the specified listbox.
SetcallFunctionto be True, if you want to call any associated functions. -
.setListBoxRows(title, rows)
Sets how many rows to display in the specified ListBox. -
.setListBoxMulti(list, multi=True)
Configures whether the specified ListBox is single or multi select. -
.setListBoxGroup(list, group=True)
Adds the named ListBox to a group of selectable ListBoxes.
All ListBoxes in the group can have items selected at the same time. -
.setListItemBg(title, item, colour)&.setListItemFg(title, item, colour)
.setListItemAtPosBg(title, item, colour)&.setListItemAtPosFg(title, item, colour)
Sets the background or foreground colours the specified ListBox item.
Can either specify a named item (will update all with that name) or the position of an item.
Get ListBoxes
-
.getListBox(title)
Gets all of the selected items from the specified ListBox. -
.getAllListBoxes()
This will return the contents of all ListBoxes in the app, as a dictionary. -
.getAllListItems(title)
Gets all of the items from the specified ListBox.
Scale
A slider, that has a minimum & maximum value.
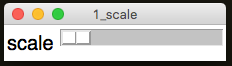
from appJar import gui

app=gui()
app.setFont(20)
app.addLabelScale("scale")
app.go()
Add Scales
.addScale(title)
Adds a horizontal scale, with a default range between 0 and 100.
Set Scales
-
.setScale(title, pos, callFunction=True)
Sets the selected pos for the specified Scale.
SetcallFunctionto be False, if you don't want to call any associated functions. -
.setScaleRange(title from, to, curr=None)
Allows you to change the range available in the Scale.
Ifcurris provided, then the Scale will be set to that value. -
.setScaleIncrement(title, increment)
Configures how much the scale jumps, when the trough is clicked.
It defaults to 10%. -
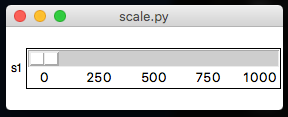
.showScaleIntervals(title, intervals)
Configures the Scale to show interval labels along its length.
intervalsshould be how often to show a value, eg.25would show 0, 25, 50, and so on...
-
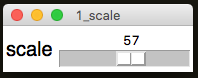
.showScaleValue(title, show=True)
Configures the Scale to show the currently selected value.
-
.setScaleHorizontal(title)&.setScaleVertical(title)
Changes the Scale's orientation to the specified value.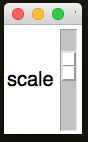
-
.setScaleWidth(title, width)&.setScaleLength(title, length)
Sets a width/length for the scale's slider. -
.setScaleChangeFunction(title, func)
Sets a function to call, each time the scale is changed.
The function must take one parameter, which will be populated with the scale's title. -
.clearAllScales(callFunction=False)
This will set all Scales in the app to their minimum value.
SetcallFunctionto be True, if you want to call any associated functions.
Get Scales
-
.getScale(title)
Gets the currently selected value from the scale. -
.getAllScales()
This will return the contents of all Scales in the app, as a dictionary.
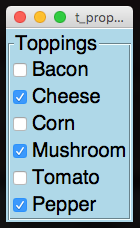
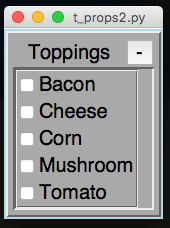
Properties
A compound widget that shows multiple CheckButtons linked to a dictionary.
Note, dictionaries have no order, so when added as a dictionary, the items will be automatically sorted.
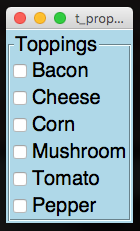
from appJar import gui

toppings={"Cheese":False, "Tomato":False, "Bacon":False,
            "Corn":False, "Mushroom":False}

app=gui()
app.setBg("lightBlue")
app.setFont(20)
app.addProperties("Toppings", toppings)
app.setProperty("Toppings", "Pepper")
app.go()
Add Properties
.addProperties(title, values)
Creates a new Properties widget, with the specified title.
If values is populated, then the dictionary items will be added to the widget.
Set Properties
-
.setPropertyText(title, prop, newText=None)
Change the displayed text for the named property.
If no value is provided, the original value will be used. -
.setProperties(title, props, callFunction=True)
Adds the dictionary of properties to the widget.
If any of them already exist, they will be updated.
SetcallFunctionto be False, if you don't want to call any associated functions. -
.setProperty(title, prop, value=False, callFunction=True)
Sets the named property to the specified value.
If it doesn't exist, it will be added first, at the end of the widget.
SetcallFunctionto be False, if you don't want to call any associated functions. -
.deleteProperty(title, prop)
Deletes the named property from the widget. -
.resetProperties(title, callFunction=True)
This will reset the specified Properties back to its original values.
SetcallFunctionto be False, if you don't want to call any associated functions. -
.clearProperties(title, callFunction=True)
This will set all values in the specified Properties to False.
SetcallFunctionto be False, if you don't want to call any associated functions. -
.resetAllProperties(callFunction=False)
This will reset all Properties in the app back to their original values.
SetcallFunctionto be True, if you want to call any associated functions. -
.clearAllProperties(callFunction=False)
This will set all values in all Properties in the app to False.
SetcallFunctionto be True, if you want to call any associated functions. -
.setPropertiesBoxBg(title, newCol)
This will change the background colour of all tick boxes in the properties widget.
Get Properties
-
.getProperties(title)
Gets a dictionary of the all items in the Properties widget. -
.getAllProperties()
This will return the contents of all Properties in the app, as a dictionary. -
.getProperty(title, prop)
Gets the value of the named property.
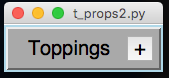
Examples
It's possible to put Properties into ToggleFrames, and also set a Function to listen for any changes.
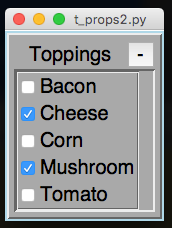
from appJar import gui

def changed(props):
    print("Changed", props)

toppings={"Cheese":False, "Tomato":False, "Bacon":False,
            "Corn":False, "Mushroom":False}

app=gui()
app.setBg("lightBlue")
app.setFont(20)

app.startToggleFrame("Toppings")
app.addProperties("Toppings", toppings)
app.setPropertiesChangeFunction("Toppings", changed)
app.stopToggleFrame()

app.go()
DatePicker
A widget to capture a date - will handle presenting accurate drop-downs, and return a date.
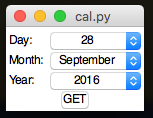
from appJar import gui

def showDate(btn):
    print(app.getDatePicker("dp"))

app=gui()
app.addDatePicker("dp")
app.addButton("GET", showDate)
app.setDatePickerRange("dp", 1900, 2100)
app.setDatePicker("dp")
app.go()
Add DatePickers
.addDatePicker(title)
Create a DatePicker, with a range from 1/1/1970 to 31/12/2020
Set DatePickers
-
.setDatePicker(title, date=None)
Will set the specified DatePicker to the specified date, or current date if no date is supplied. -
.setDatePickerRange(title, startYear, endYear=None)
Set the range for the named DatePicker.
If endYear is None, the current Year will be used. -
.setDatePickerChangeFunction(title, function)
Set a function to call when the DatePicker is changed. -
.clearDatePicker(title, callFunction=True)
This will reset the specified DatePicker to the earliest available date.
SetcallFunctionto be False, if you don't want to call any associated functions. -
.clearAllDatePickers(callFunction=False)
This will reset all DatePickers in the app to their earliest available date.
SetcallFunctionto be True, if you want to call any associated functions.
Get DatePickers
-
.getDatePicker(title)
Will return the currently selected date. -
.getAllDatePickers()
This will return the contents of all DatePickers in the app, as a dictionary.
Auto-Labelled Widgets
It's possible to automatically include a label alongside some of widgets below.
Both the label and widget will be placed in the same grid space.
Simply add the word Label to the command when adding the widget:
.addLabelEntry(title).addLabelNumericEntry(title).addLabelSecretEntry(title).addLabelAutoEntry(title, words).addLabelScale(title).addLabelOptionBox(title, values).addLabelTickOptionBox(title, values).addLabelSpinBox(title, values).addLabelSpinBoxRange(title, from, to)